I had just pitched my crazy-sounding plan to a potential client during a sales call...
After 15 seconds of silence, he finally said: "You're kidding me, right...? So you're telling me if I delete 80% of my content, I'll actually get more organic traffic? Are you insane?"
That wasn't the first time I'd gotten that kind of response.
Having been in the search engine optimization (SEO) world for 6+ years now, I've been called just about every synonym for "crazy" you can find in the thesaurus. Most people don't like hearing that their non-SEO-focused content is actually hurting them from an organic-traffic standpoint.
But here's what they don't realize: It has been proven—time and again—that you can generate more organic traffic every month with just a handful of SEO-focused posts than you can with tons of nonoptimized posts.
(Here's a great case study from Ahrefs that shows this is true.)
An example: after removing and redirecting 195 blog posts (more on how to do this in a minute), my friends at ReputationManagement.com generated close to a 100% increase in organic traffic in just five months.
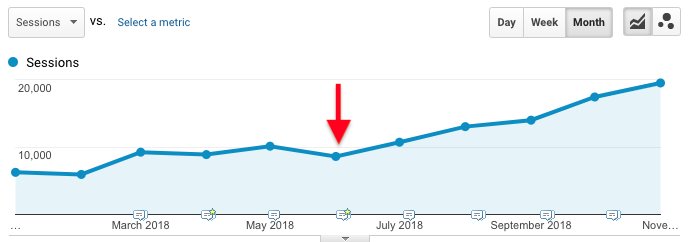
Another example: A client's monthly organic traffic increased from 20k to 120k in 19 months after removing over 100 blog posts, and focusing only on SEO content and building links.

So, if you have a lot of unoptimized posts on your blog and you're thinking of doing a content audit, this article is for you.
Here's the exact process I use.
My Simple Six-Step Content Audit Process
Step 1: Compile a spreadsheet with every post on your site
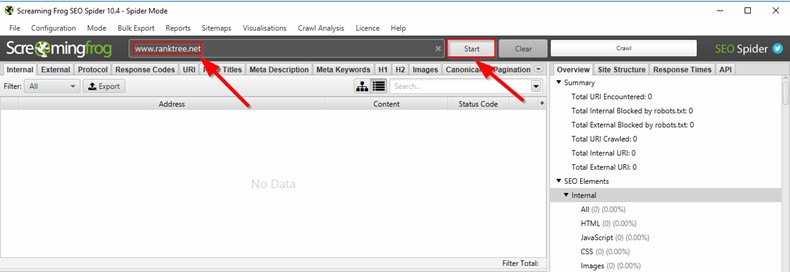
You can put this together manually, but a tool like Screaming Frog makes the process much easier.
(Note: I'm not affiliated with Screaming Frog. It's just my favorite tool for technical SEO shenanigans.)
Simply plug in your URL and click start, then Screaming Frog will crawl your site—returning every associated URL it finds.
Once it's done crawling your site, apply an HTML filter and export the results as a .csv.
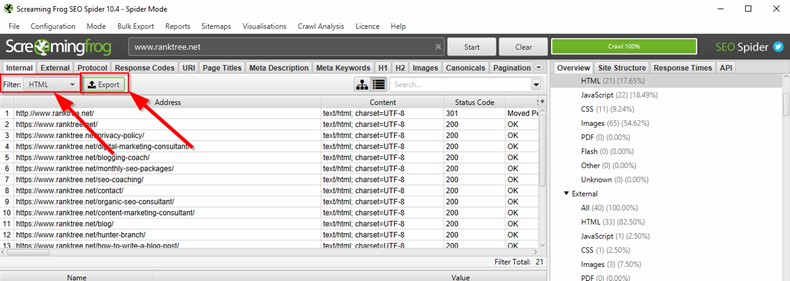
You'll end up with a list of all of your pages and posts; you can then easily import that information into Google Sheets.
Step 2: Get critical metrics for each URL
Now, it's time to find out the following:
- How many pageviews each URL got in the past 28 days
- How many organic clicks each URL got in the past 28 days
- How many referring domains and backlinks each URL has
We'll use Google Analytics and Google Search Console to get those numbers.
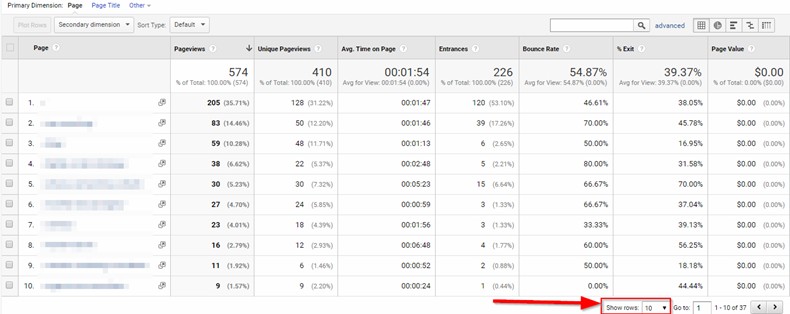
A. Finding Pageviews for the Past 28 Days
You've probably done this 1,000 times by now; it's pretty straightforward.
Just head to Google Analytics then click Behavior, Site Content, and All Pages.
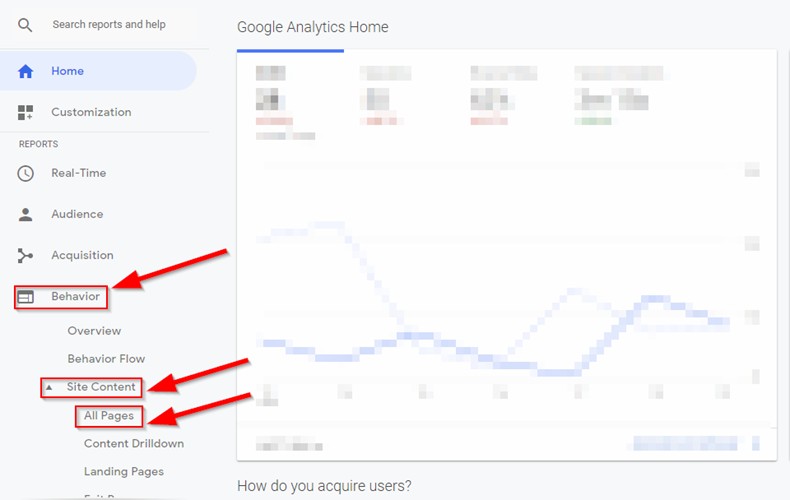
Scroll to the bottom of the report and change Show Rows to show all URLs on your site, then export as a .csv so you can import the report into Google Sheets as a new sheet.

B. Finding Referring Domains, Backlinks, and Clicks from the Past 28 Days
To find link data, head to Search Console and click Links then More under External Links.
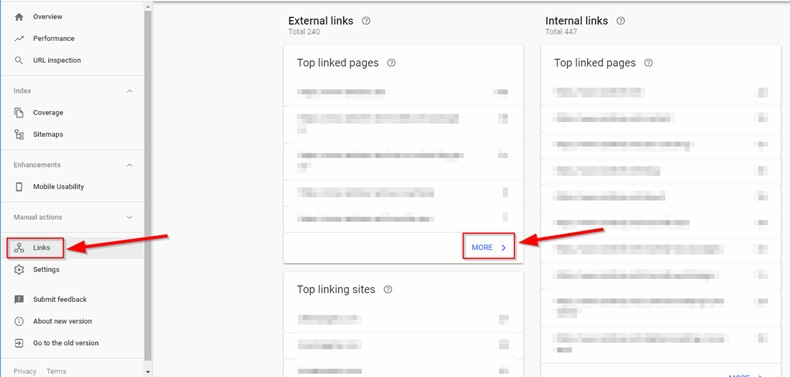
Export the report as a .csv and import it into Google Sheets as a new sheet.

Now, we're also going to figure out how many organic clicks each URL has generated over the past 28 days.
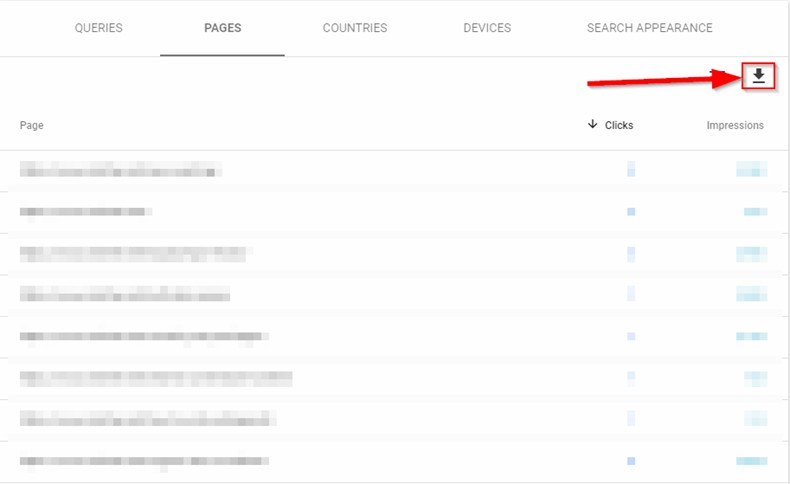
To do that, click on the Performance Report in Google Search Console, then click Pages.
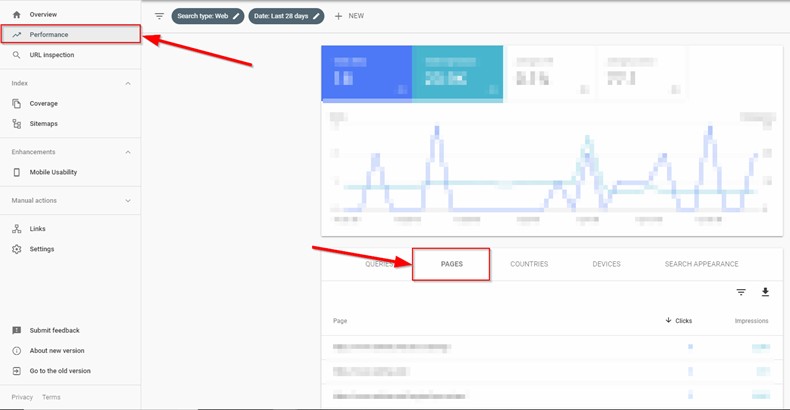
Export this table as a .csv and add it to your Google Sheet as a new sheet.
C. Getting All That Data on the Same Sheet
The easiest way to match all the traffic, click, and backlink data with your URLs (other than using a Vlookup) is sorting the column with your URLs by alphabetical order in each sheet.
Then, you can just copy/paste traffic and link data into your main sheet once you've added the appropriate columns.
Step 3: Determine which posts to keep
Here's where things get interesting...
You have all the data you need; now you have to decide which posts to kill.
This can be a bit tricky...
- Some of your content will get consistent pageviews but no organic clicks.
- Some of your content will get consistent conversions but not many organic clicks or pageviews.
- And some of your content will get tons of organic clicks but few conversions.
How do you determine which pages to keep (knowing that nonoptimized pages can hurt you from an SEO standpoint)?
Here's the exact process I use to navigate this issue based on several massive, successful content audits I've done for clients.
A. Keep all posts that generate consistent organic clicks
Based on your traffic numbers, determine a cut-off point for the number of clicks a post needs to stay alive.
An example: A post with 10 clicks per month should stay alive if you get a few hundred visitors per month, but it should die if you get a few thousand visitors per month.
Just make a judgement call here.
B. Tell Google to ignore important posts that don't generate clicks but do generate pageviews or conversions
Luckily, you can still keep nonoptimized posts that are crucial to your business (posts that generate referral traffic, convert well, or constitute part of an ad funnel) by telling Google not to consider them for its index.
You can easily do this with the Yoast plugin in WordPress, for example.
Just head to your post/page in WordPress, scroll down to the Yoast box, click the gears, then select No under "Allow search engines to show this post in search results?" and "Should search engines follow links on this post?"
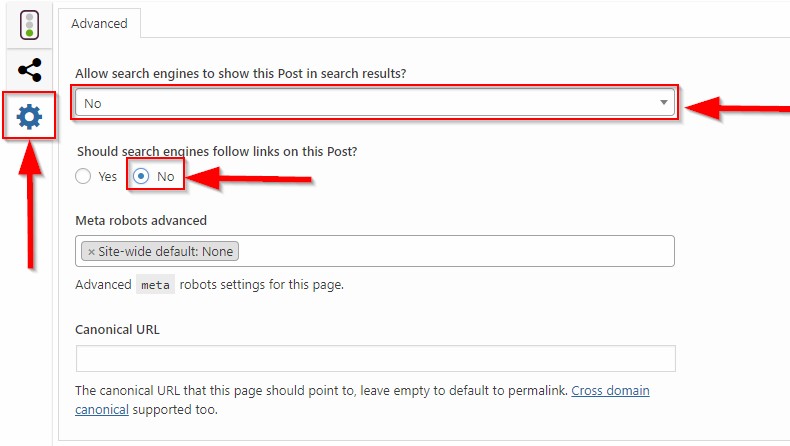
Note: this is not an ideal solution, because Google can still choose to include the posts in its index. So be sure to do this only with posts your business can't live without.
C. Kill every other post on your site
Here's where things get sad, and a bit morbid...
It's time to kill your old content.
This is super-hard to do—especially because you spent hundreds of hours writing all that incredible content, and you don't want to kill those posts just because they aren't generating organic traffic.
I know the feeling...
But it's for the best.
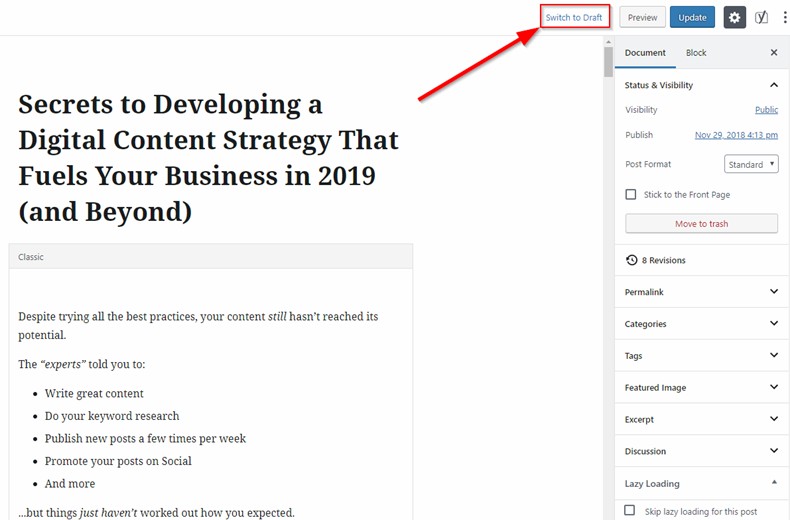
Don't cry too long, though, because you can remove those posts and still save the content for future use by switching them to drafts.
To do this in WordPress, simply head to your post and click Switch to Draft.
Step 4: Set up redirects for every dead post that had backlinks
Now, it's time to wipe the tears from your eyes so you can make SEO magic happen.
From every post you killed that had backlinks to a relevant SEO asset, set up a 301 redirect. (If you don't have a relevant SEO asset for certain posts, just redirect them to your homepage.)
When you do this, all the backlinks your dead posts had will be transferred to your SEO assets—helping them rank even higher.
Awesome, right?
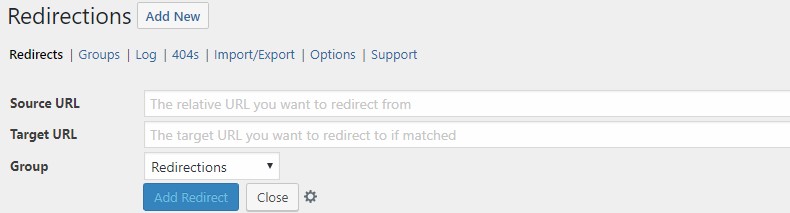
The Redirection plugin for WordPress makes this process easy (even if you've never set up a redirect before).
Once you've downloaded it, just enter your old post's URL as the source and a relevant SEO asset as the target, then click "Add Redirect."
Step 5: Beef up your SEO assets
This is a crucial step most people overlook, and it's easy to see why.
Since your SEO assets already rank well, you can just leave them alone indefinitely and they'll generate traffic, right?
Sure, but doing that leaves huge traffic opportunities (and money) on the table.
Most bloggers and content marketers don't know that they can actually make their SEO assets rank for even more keywords with little work thanks to Google Search Console and the Google Hummingbird algorithm update in 2013.
For example, here's a screenshot of one of my client's SEO assets that ranks for nearly 6,000 keywords:

Here's a really easy way to take advantage of this opportunity:
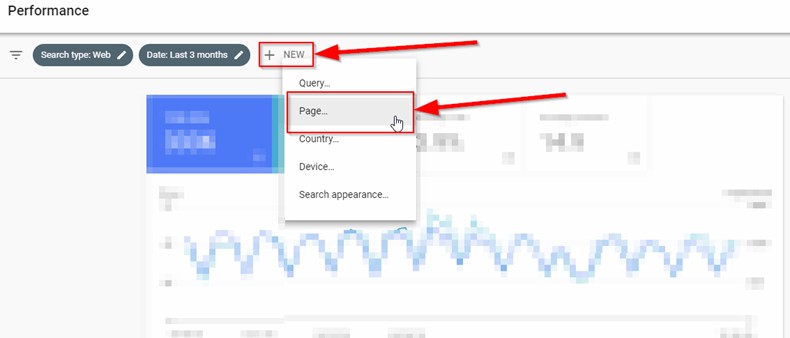
A. Head to the Google Search Console Performance Report
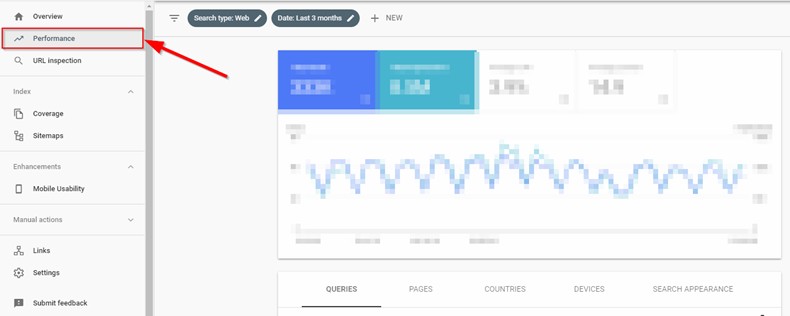
B. Add a page filter with the URL of one of your SEO assets, then click on Queries and sort by Impressions
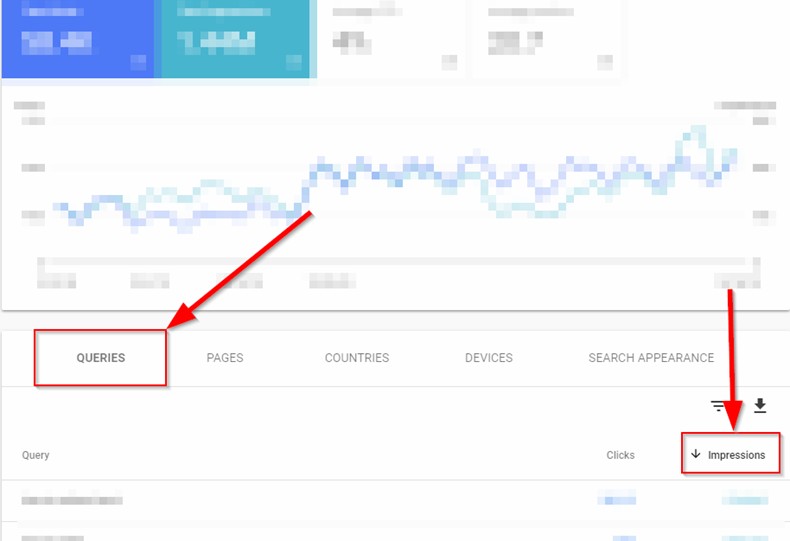
C. Look through the list to find keywords that your asset shows up for often (high impressions) but doesn't generate many clicks
Add phrases similar to your target keyword a few times in your asset's headings and body.
Then, add new sections for related keywords you didn't originally include.
Example: Including new, short sections targeting keywords like "what is [your keyword]," "[your keyword] examples," etc.
You'd be surprised at how much more traffic you can generate from such little work.
(Another tactic here is to make your content even more valuable so you can generate more links. I have a guide that shows you how to do that in an SEO-focused way, step-by-step. Check it out.)
I recommend doing this work for each SEO asset at least once per quarter to stay on top of opportunities and to keep your content fresh.
Step 6: Submit a new XML Sitemap to Google
Now, all you have to do is tell Google that you've made changes to your site.
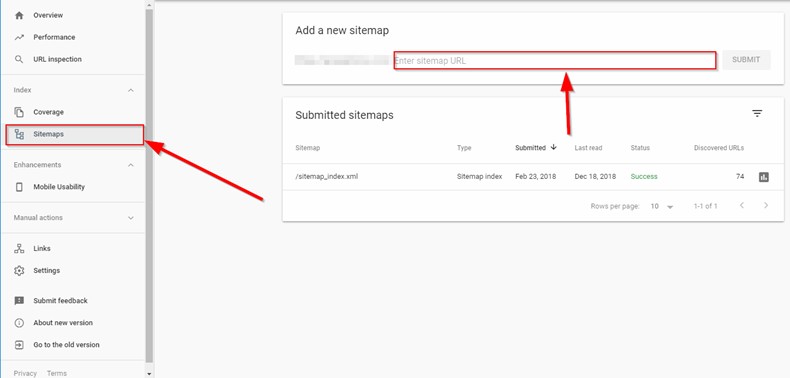
Just submit a new XML sitemap to Google through Search Console.
To do so, head to Google Search Console, click on "Sitemaps," and copy/paste "/sitemap_index.xml" into the field.
Note: If you have Yoast, you'll automatically have an XML sitemap: You don't have to worry about making one manually.
Over time, Google will recrawl your site and will notice all your changes.
Some 30-60 days after you submit your sitemap, you'll start seeing incredible things happen
What All This Will Do for You
Performing a content audit like this helps...
- Direct Google's attention to key posts and pages on your site
- Give your current SEO assets even more links and authority—helping them rank even higher
- Make your SEO assets even more valuable and help them rank for 1000s of keywords rather than just a few
And what do all three of these things do for your site?
Skyrocket your consistent, passive traffic from search engines.
And if you're like me, the idea of getting consistent traffic with little ongoing work is really exciting.